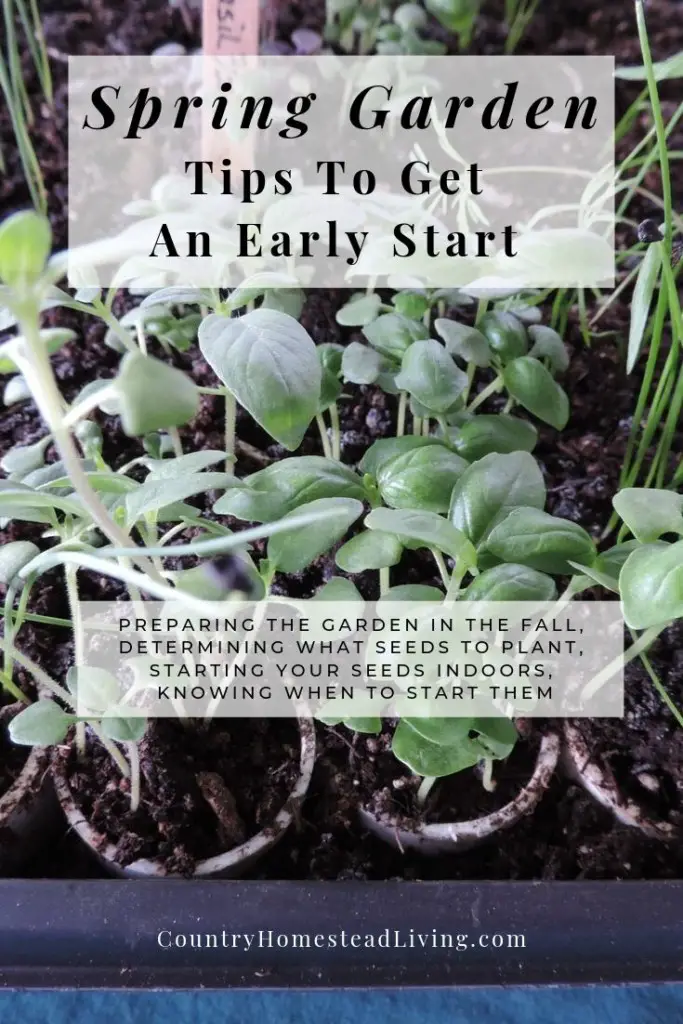
Here in the Pacific Northwest where we still have snow on the ground as I write, I find myself turning to thoughts of planning for our Spring garden.
Having gardened for most of my life I know that planning ahead will help to have produce to harvest much sooner.
What are some tips on getting an early start for the Spring Garden?
Preparing the garden in the Fall, determining what seeds to plant, starting your seeds indoors and knowing when to start them are just a few of the tips to get an early start.
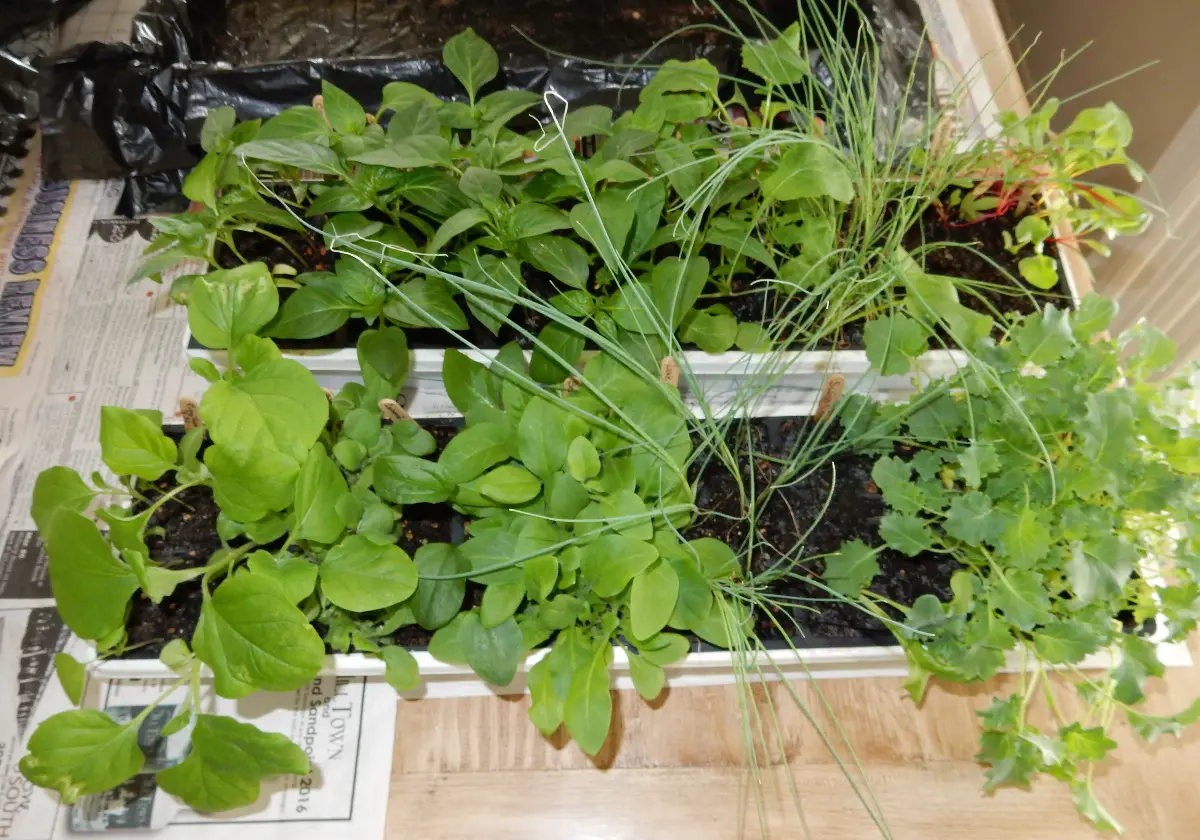
Through the years of gardening I have found different methods for getting a head start on my garden that I’d like to share with you.
There’s absolutely nothing so rewarding as starting your little plants from seed, watching them thrive and getting them out into the garden space early.
Spring Preparation Begins In The Fall
One would think that all you need to do to start a garden is to get out into it and start planting come Spring.
While that will probably do okay for some areas it really doesn’t work for all areas of the country.
Here we can have light to hard frosts after I have taken the time to plant outside only to have them be hit by a frost.
Then there’s the soil.
To help insure that your garden soil is rich and healthy its a really good idea to start preparing it during the Fall.
This way it’s sitting during the Winter time, even under the snow like we have here, with the micro-organisms happily at work enriching your soil for the Spring planting.
Yes, even the earthworms are at work.
We like to add layers of horse or chicken manure over our garden beds while also covering them with old hay or straw.
It helps to keep the soil covered under the snow and something for the earthworms to feed on, turning our soil into wonderful healthy rich soil.
Planting cover crops in your garden beds is also a wonderful tip for enriching your soil.
It helps to keep the soil covered under the snow and also helps to bring nitrogen into your soil.
When it’s time for planting you either cut and drop the winter greens in the Spring or turn it under before planting.
If you have access to dead Autumn leaves that have not been sprayed with chemicals, they work wonders for mulching your garden for the Winter.
They are famous for adding richness to the soil and helping to lighten up the soil texture.
They are also great for mulching your garden after you have planted it.
It really adds to the health of the soil and your plants will simply love growing in this leaf mold.

Since we use raised beds in our garden area because of very rocky soil I don’t usually have much problems with keeping the weeds down in my beds.
It’s so easy to spot them and take care of them before they can get out of hand.
I do use dark aged wood chips though to mulch my raised garden beds.
But if you are gardening in the ground instead of raised beds, mulching with leaf mold helps to cut down on the weed population.
It’s a good idea to give your leaf mulch a good 4 – 6 inches of depth, even up to 10 inches is good, to help keep the weeds from taking hold.
Leaf mold breaks down slowly helping to enrich the soil gradually.
You will find that earthworms and the different micro-organisms just love it when they have mulch to devour turning your soil into a rich black organic matter.
Warming Up The Soil
First you need to warm up the soil if you are planning to sow some seeds in the ground in early Spring.
Critical elements for starting seeds in the garden are air and soil temperature.
If the soil is not warm enough, your seeds will not germinate.
Checking your soil temperature is easy when using a soil thermometer.
They are an inexpensive tool yet so useful when determining if the soil is at the optimal temperature for germination.
To get a head start on your garden you need to understand the temperature requirements of the plants you plan to sow.
Your seed packets will give you the ideal times for your seeds to be sown into the ground.
It helps to know what the ideal temperature of the soil should be for your seeds or seedlings.
So how does a gardener know when the soil is warm enough to plant?
Dr. Jerry Parsons, Extension Horticulturist at the Texas Agricultural Extension Service, has identified what he calls a “realistic” soil temperature for germination.
This is a soil temperature at which gardeners can expect good germination and strong early growth.
https://www.gardeners.com/how-to/when-is-it-warm-enough-to-plant/9029.html
Since plants depend more on soil temperature than how warm or cold it is outside, warming up the soil can help some plants to germinate easier.
There are some plants that once they germinate can withstand a light frost.
Cool weather crops such as Cabbage, Cauliflower and Broccoli can survive a light frost.
Planting these as seedlings is usually better than direct sowing to get a head start.
Onions and Scallions can be planted just as soon as the ground can be worked in the Spring.
Same with Snow or Snap Peas which like it cooler anyway to grow.
Even Turnips, Beets and Carrots can be directly sown in early Spring.
Experimenting for your area to see what works best for you is a good thing.
Black plastic is a wonderful way to warm up your garden soil, making the Springtime come earlier for your garden.
The plastic helps hold in the heat from the sun while also helping to kill some of the weeds and pests that are under the plastic.
After your soil has been preheating for about a month you can either remove the plastic to plant or cut slits in it for planting your plants.
Preheating for about a month can give you about a month’s head start on your garden plants.
Cold Frames, Mini-Greenhouses & Cloches
You will want to make sure that the nighttime air temperatures are above the freezing level before you try to plant your summer vegetables.
If the temperatures are still a little on the cool side or you fear a light frost you can utilize things like cloches or row covers as well as mini hoop houses or greenhouses.
It’s possible to make your own cloches from clear plastic jugs or bottles to keep the cost down as traditional glass cloches can be quite expensive.
Who wants to plant a package of inexpensive seeds only to pay a lot for something to cover it for protection? Not me!
Simply cut the bottom of the jug or bottle off, place the plastic jug or bottle over the plant leaving the lid off the bottle and watering through this opening.
Works great as a little mini-greenhouse for your plants until they get too large for its cover.
Simply remove it when that happens and usually by then the chance of a frost has passed.
Every early Spring after I have started my lettuces indoors I move them out into a raised garden bed after the soil has warmed up some but there is still a huge chance for frost.
I’ve many times used plastic cloches I have made to protect my plants until it’s warm enough to not need to be protected.
Most of the time though we have used mini-hoop house coverings over our small raised beds.
By first laying row cover (garden fabric) over the plants and then covering it with a mini hoop house made with greenhouse plastic and wire hoops to hold it up off the bed, we have been able to have wonderful lettuce much earlier in our garden, protected from any frost.

Building a cold frame out of wood with a glass window or clear plastic top is a great way to keep plants from being hit by a light frost in early Spring.
Cold frames work sort of like mini-greenhouses keeping the air and soil inside of them about 5-10 degrees warmer than the rest of the garden.
Containers and flower pots can also be used when planting vegetables and flowers early as they can then be moved indoors at night or on chilly days.
There are so many ways if you just put your thinking caps on.
When To Start Your Seeds
Spring is here and it’s time to give those vegetables and flowers you have planned for growing in your garden a head start.
Depending on the growing zone you live in will determine just when its the best time for you to start sowing your seeds.
But how do I know how early I need to start the different seeds I want to plant for my area you might ask.
Check out this website…go to almanac.com/gardening/planting-dates.
There’s where you will find a Gardening Calendar.
All you need to do is to put in your zip code and it will give you the dates that are best for your area to plant the different things you want to grow in your garden.
If you like, you can even print out this calendar with the information that’s just right for your area so you will have it handy to check it when needed.
Very helpful!
Making Some Seed Starting Plugs
There are many ways in which to start your seeds.
You can get creative in finding containers to start your seeds in or you can purchase different trays and planters to get them started.
Last year we started some of our seeds in gardening plant trays filled with seed starting plugs that we made from PVC pipes.
I came across this idea while searching the web and thought it would be a neat way to try starting our seeds. It turns out it was a wonderful way to start plants!
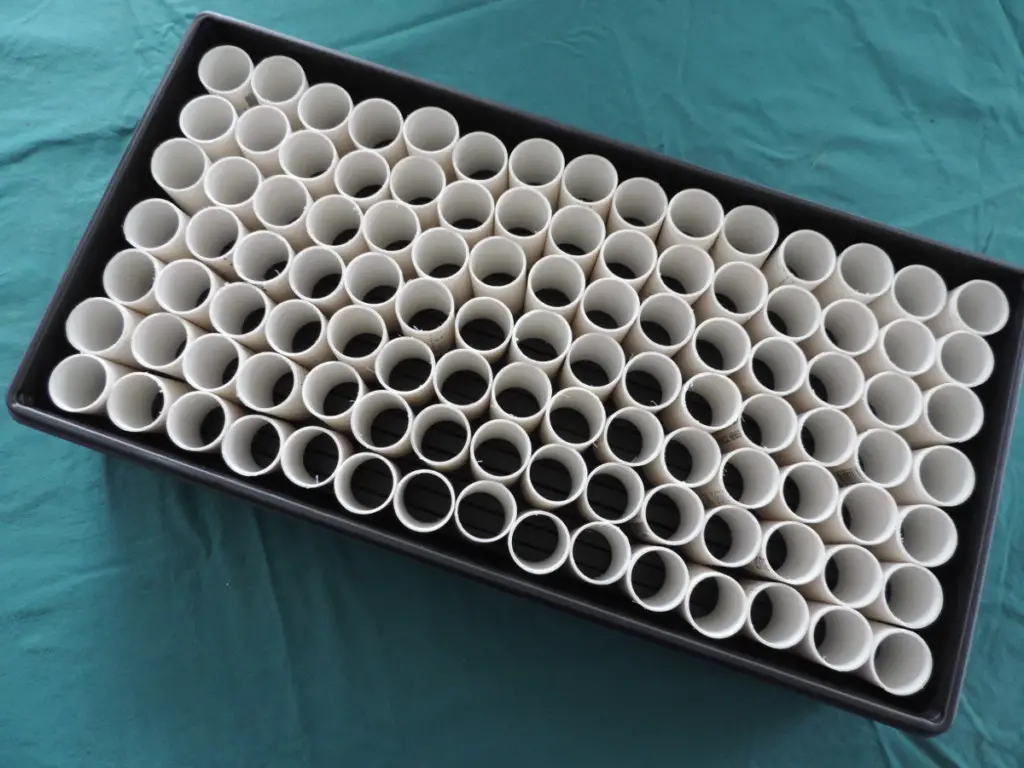
To do this method you will need a thin walled 1” PVC pipe that is then cut into 2” lengths.
One garden plant tray will hold 105 plugs, 7 rows of 15 plugs.
Be sure to wash and sterilize your plugs before using them.
Using the seed starting soil of your choice that you have moistened, fill all the plugs pressing with your thumb or something that fits the holes of the plug to lightly pack in the soil.
Leave just a little space at the top for your seeds, sow the seeds you want into each plug and cover with more soil according to your seed packet instructions.

Now is the time to cover your tray with either the clear dome that is made to go with your tray or some plastic wrap laid down over the top to help germinate the seeds.
Place your tray under lights or where they will get some light and watch them start to grow.
My little seedlings each year would get leggy even though I was using what I thought was really good lighting.
Not so… Until I found lights called PowerPAR shop lights by Hydrofarm.
I never get leggy plants now!
Don’t forget to label your different seed plugs so you will know what you have planted and not be surprised later.
It is so easy to forget what you sowed.
Even if you can tell by the looks of the plant you will not be able to tell if you have a hot pepper or a mild pepper for instance until you have harvested it and tasted it.
Now that would be some kind of a surprise for sure!
When you start to see the top of your soil drying out its easy to bottom water in the tray.
You could also spritz a little water over the top if needed.
By moistening the soil first and then sowing your seeds it will be a few days before you will need to water them.
Now that your seeds have started to come up and are getting too big for their plug, it’s time to up-pot them into a larger home since they are still too small for the outdoors.

With this starting method its easy to just take each plug out of the tray as needed.
I have always found it a little more difficult when using 4 or 6 pack plant containers to get each little plant out without hurting the plants.
Using these little plugs has proven to be much easier.
These little plugs should last for many years to come for future seed starting.
You would want to make sure to clean and sterilize them well before their next use.
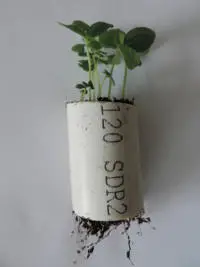
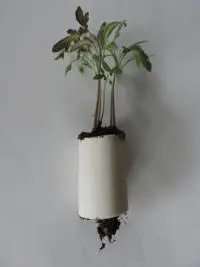
On the left are Black Krim Tomato seedlings in their PVC plug.
And on the right are Mammoth Basil seedlings in their PVC plug.
When its time to up-pot your little seedlings its very easy to push up from the bottom to take the seedlings out of their plug.
So far, I really like this method for starting my plants.
Little Mini Greenhouses
As our little plants start to grow too big for their little plugs and we have up-potted them into larger containers they could be too little yet for planting straight out in the garden.
Or maybe the weather is still not warm enough for you to put them outside.
Using mini greenhouses is one way that you can transition them to a little larger home yet still give them a warm place to grow either indoors or outdoors while it’s still too much like winter.
Again, I love to research for different ideas on gardening.
While doing so I came across a video that showed a unique idea to make little mini greenhouses.

Using any size plastic storage container you would like to use that would hold your potted plants, turn the container upside down.
Place your little pots on the lid which now becomes the bottom of the mini greenhouse.
Then place the bottom of the container over the top which now becomes the dome of your mini greenhouse.

When snapped into place it makes it easy to move these wonderful little greenhouses to where you need them.
Whether it’s moving them outside during the day or somewhere inside the house.
It will also help keep any unwanted bugs out of your plants while you might still have them in and out of the house until it’s time to plant them out in the garden.
I have a few plastic containers that Spinach comes in from the grocery store.
These can even be used to start your plants in as well as be used for transitioning them to the outdoors when the time comes or for Winter sowing.

Starting our plants inside means these little plants have never experienced the sunshine, wind or rain so they need to acclimate slowly to these elements.
This is one way we can do it easily after they have been growing indoors.
Each year as we get our plants used to the outdoors it can be a little bit of a hassle moving them in and out.
I like this idea as it should make it so much easier with this method.
It’s easy to get a little creative and see what you might have lying around the house that you can use to make your own mini greenhouses.
Related Questions
What temperature is too cold for plants?
A freeze is any air temperature that is below 32℉, the freezing point for water.
Whether getting that cold actually damages your plants in the garden will depend on how low it goes and the species of the plant.
It’s also determined by whether it is in a sheltered spot of your garden and how long its at the low temperature plus many other factors.
How do you make plants grow faster naturally?
You can learn strategies of how to make all your plants grow faster and live longer healthier lives by improving the soil with the right balance of nutrients.
Picking the most suitable location in the garden for your plants and watering your plants adequately will also help your plants to grow faster naturally.
Are tomatoes easy to grow?
Yes, tomatoes are easy to grow depending on what variety you are growing.
Cherry Tomatoes are probably the easiest tomatoes to grow for beginners.
They have very few problems and produce a large amount of sweet small fruit.
To find out more, you can read an article I wrote, “Growing Tomatoes – Tips, Tricks, Health Benefits, Fertilizer” where I share a lot about growing tomatoes.
What can I plant in early spring?
Plants that are cold weather plants such as Snow Peas and their cousins the Sugar Snap Peas are best planted just as soon as the soil can be worked in early Spring.
Other easy early plants are things like Kale, Radishes, Broccoli, Cabbage and Lettuce.