The ideal spot for a garden on our homestead happened to be where a previous owner had graded the lot before building a metal shop.
The grading had removed the top soil and left hard rocky soil that grew a mixture of weeds and some low growing grass.
There are several problems with rocky soil:
- Rocky soil is very difficult to cultivate
- Rocky soil is commonly low in plant nutrients
- Rocky soil tends to allow rain water to run off because the soil is hard packed
These problems make it very difficult to make rocky soil produce a good garden.
Trying To Cultivate Rocky Soil
For every shovel full of soil dug out of this portion of our homestead there was a half a shovel full of rocks!
What wasn’t rocks was hard packed dirt that was of a light brown color.
The weeds and grass even seemed to have a hard time growing up high enough to worry about mowing them.
That can be one sign of a deficiency of plant nutrients in the soil.
If you tried to water the grass and weeds the water pooled on level areas and ran off of the areas that were sloped.
Very little water soaked into the soil.
In this situation we decided to build a raised bed on top of the rocky soil.
Making The Raised Bed
The summer before we decided to put a raised bed over the rocky soil we had learned of a small sawmill that was going to burn the cedar slabs that were not useful to sell.
We contacted the owner and offered to remove the cedar slabs so he would not need to burn them.
He agreed and we ended up with 3 pickup loads of various sized cedar slabs, some almost 16 feet long.
Cedar is a wood that does not rot easily.
You can expect cedar boards or slabs that are in direct contact with the ground to last for 10 years, sometimes longer.
We decided to use the cedar slabs for the sides of the raised bed.
We chose cedar slabs that were about 1″ thick and were as uniform a width as we had to form the sides of the raised beds.
The boards were not all a uniform width but we choose those that came as close to a uniform width as we had available.
The average width of the cedar slabs was about 6″.
Six inches may not sound like a very deep raised bed.
But we decided to go with the materials we had on hand and see what the results would be.
We made the raised bed 10′ X 32′ in size. This would give us 320 square feet of new garden space.
To hold the cedar slabs in place I cut 3/8″ rebar into 12″ lengths.
The rebar was driven about halfway into the ground.
And the cedar slabs were attached to the rebar by drilling a small hole in the slab on each side of the rebar and wiring the cedar slab to the rebar with 16 gauge steel wire.
The rebar was spaced about every 4′ or 5′ all around the raised bed.
At the four corners, there was a rebar holding each end of the cedar slabs. Two rebar at each corner.
Now that the frame for the raised bed was completed, we began to fill the framework with dirt and organic material.
How We Filled The Framework
First we covered the rocky soil, weeds and grass with newspapers at least 4 thicknesses deep.
The purpose of this was to kill the weeds and grass and form a basis for the weeds, grass and newspaper to turn to compost over time.
This would help change the rocky soil to a better soil with more plant nutrients.
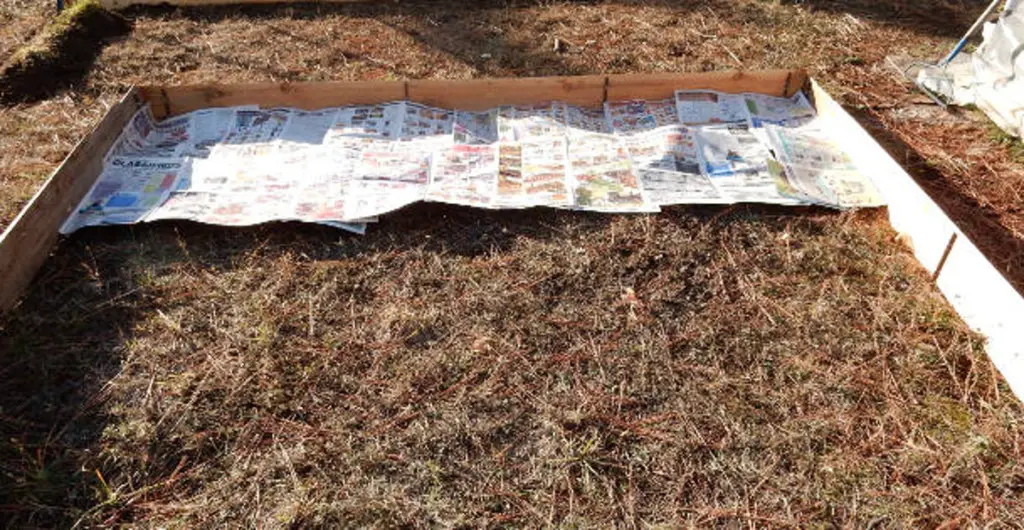
We wet the newspaper with a hosed as we went to keep it from blowing away as we were working on a windy day.
After laying down several feet of newspaper and wetting it, we’d place about 2″ of dirt on top of the newspaper and smooth it out with a rake.
We had found, on Craig’s List, a place where there was a mixture of dirt and horse manure that was free for the taking.
The dirt was loaded for us and we were able to get four 6′ pickup loads that was rounded up as high as possible.
We filled the framework in three stages.
The first was to cover the newspaper with about 2″ of the dirt and manure combination.
Then we put a layer of straw that was a couple of years old that we were able to get for going and removing it so new straw could be placed in a farmers barn.

On top of the layer of straw we added the rest of the free topsoil and manure combination.
This gave us about 6″ of soil and straw to plant in.
We had purchased two pickup truck loads of aged wood chips from a tree service.
The aged wood chips were some 7 or 8 years old and were dark black in color and felt like soil in your hand.
They had been a combination of pine, fir and larch (tamarack) wood chips.
We covered the soil on top of the new raised bed with a layer of aged wood chips, probably about 2″ deep.
A Word About The Aged Wood Chips
The aged wood chips did not have any Cedar in them.
We had paid $20.00 per pickup load of the chips so we had $40.00 invested in the aged wood chips.
The tree service we obtained the aged wood chips from told us they did not include Cedar in their wood chips.
Cedar could make the soil acid and that was not good for vegetable growth.
They had aged Cedar wood chips which worked well for mulching around berry bushes because the berry bushes liked the acid in the cedar chips.
Now we were ready to plant a crop and see how well our low budget experiment in turning an area of poor rocky soil into a raised garden bed would work.
We Decided To Plant Potatoes
Potatoes would make a good first year crop in a raised bed like this one.
You could plant the seed potatoes in the 2″ of dirt just under the aged wood chips.
Then add some more aged wood chips over the tops of the seed potatoes.
As the plants grew you could place more aged wood chips around the plants and the potatoes would grow in the wood chips.
We choose two varieties of potato; a white potato called Dakota Pearl and a red potato called Red Norland.
The local supplier of seed potatoes said both varieties were suitable for this area.
We live at about the 2500 foot elevation and about 45 or so miles south of the Canadian border.
We planted 5 rows of potatoes. Each row was about 16 feet long.
So we had a total of 80 feet of potatoes that we planted.
How Did The Potato Plants Grow?
They grew very well! In fact they grew so well that they covered the entire front half of the raised bed.
It was hard to see that there had originally been 5 rows of potatoes planted.
The plants grew to almost 3′ tall.

OK, so the plants grew thick and tall. But did we get any potatoes?
We can’t complain about the potatoes either. After digging the potatoes, which was easily done by hand, we harvested 137 pounds total!
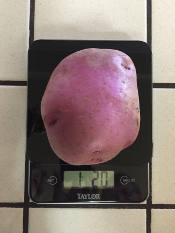
The largest Red Norland tipped the scales at 1 pound 2 ounces!
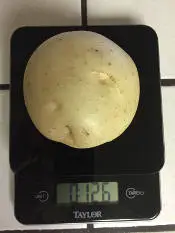
The largest Dakota Pearl was a respectable 12.6 ounces.
Both varieties were delicious!
That first summer growing season was not an ideal season for gardening.
The temperature kept fluctuating between nice and warm and unseasonably cool.
After harvesting the potatoes we found that several of the Dakota Pearl variety were rotten on the inside where they had been attached to the root.
This problem did not affect the Red Norland variety.
In researching the Dakota Pearl potatoes we discovered that they were less resistant to the type of temperature changes we had experienced that summer.
We also learned that the Red Norland variety was much more resistant to that kind of temperature changes.
If the weather had been a little more of the typical summer growing season that year we probably would have harvested 150-160 pounds of potatoes and not had the problem with the Dakota Pearls.
The next year we only planted Red Norland Potatoes and had a good crop of potatoes without any rotten ones.
If we plant Dakota Pearls again, we may try planting them in our hoop house type greenhouse and seeing if that stabilizes the temperature and keeps them from rotting inside.
What Did We Think Of Our Raised Bed Experience?
We believe our experiment in turning rocky soil into a productive garden was a success.
We took an unproductive portion of ground and turned it into a productive portion of garden space.
Yes, it took some work but we were able to make the raised bed and grow a good crop of potatoes much faster than if we had tried to dig out the rocks and improve the rocky soil.
We learned that the best and fastest way to make a productive garden out of poor rocky soil is to place a raised bed over the top of the soil.
It is much faster and we believe less expensive also.
We used cedar slabs and rebar that we already had on hand.
Much of the soil and straw we were able to get for free.
Our total cost for this project was $40.00 for the aged wood chips, $10.00 for seed potatoes and about a tank of fuel for the pickup truck.
We spent 3 days of work between getting the top soil manure mix, the aged wood chips and building the raised bed and filling it.
The result was much better and faster than if we had attempted to remove the rocks in the ground and tried to improve the soil instead of building the raised bed.
As a bonus we have a much larger garden area we can use for years to come.
We can keep on improving the raised bed instead of trying to make the rocky soil produce something more than weeds and low growing grass.
This is just one way you can improve your ability to grow a garden when the soil is poor and rocky.
Related Questions
Would you be able to grow more varieties of produce if the raised bed was deeper than 6 inches?
Yes we could.
We under took this experiment using the materials we had on hand in an effort to show that you do not have to spend a lot of money to improve poor soil conditions.
Each year we can add a couple of inches on top of this raised bed and increase what we can grow in it.
What other crops have you grown in a raised bed that is only 6 inches deep?
Over a previous winter we grew garlic in a portion of a raised bed that is only 6 inches deep.
The garlic did quite well and we were pleased with the harvest.
Do you grow a lot of your garden in raised beds?
Actually we do.
Raised beds make it much easier to plant and harvest the produce.
Some of our raised beds are set up on pallets so they are between 2 feet and 2 feet 6 inches high.
We also have planted in a stock watering trough that no longer holds water and in a claw foot tub that has a large hole in the bottom of it.
Both make a great raised bed planter.