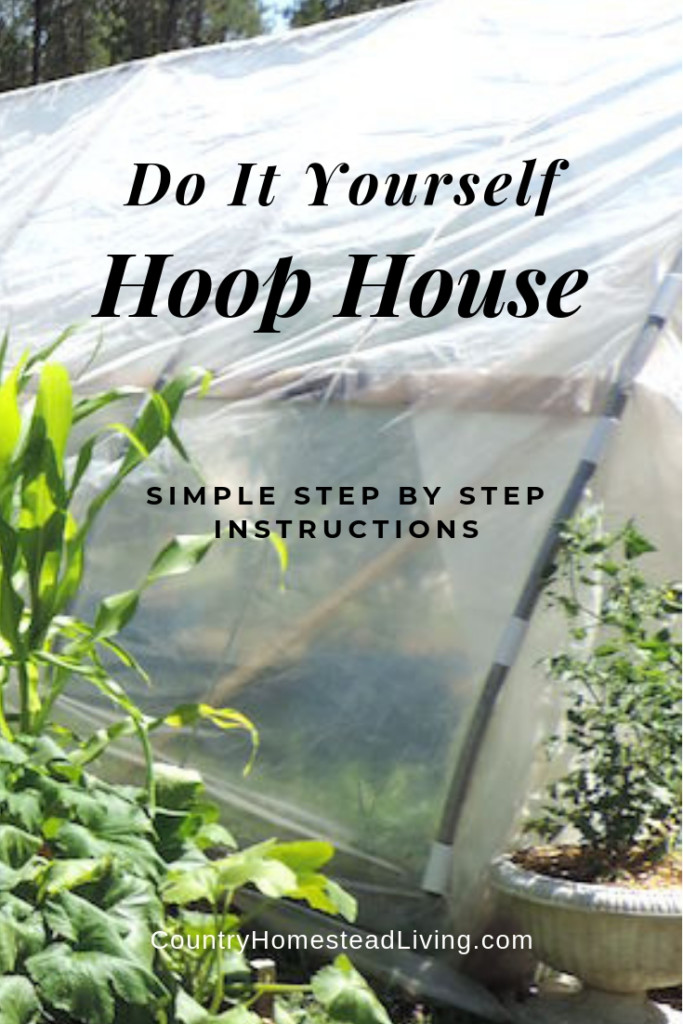
For the last four years we have been extending our growing season with a hoop house style greenhouse.
The hoop house we designed and constructed is simple to make, has withstood winds in excess of 75 mph and will not break the bank to build.
The benefits of a hoop house style greenhouse include:
- ease of construction
- increased garden yield of produce
- simple to take down in late fall and reassemble in early spring
- years of useful life for a minimal cost
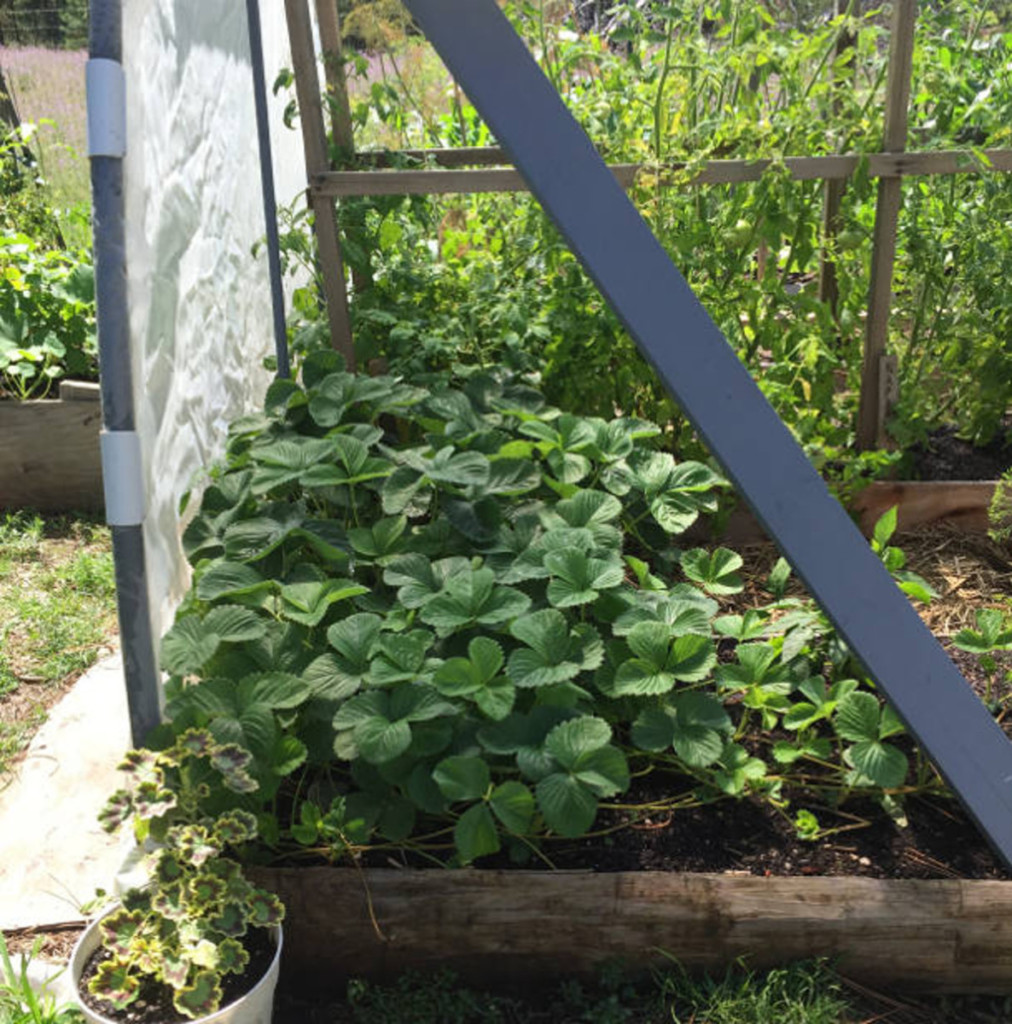
For several years we had raised strawberries, tomatoes and lettuce in a few raised beds.
We wanted to take our food production to the next level.
In our part of the country where the time for gardening is short, that means extending your growing season.
We did not have the nearly $3,000.00 needed to build a regular greenhouse the size we wanted, so we opted for a hoop house which cost much less.
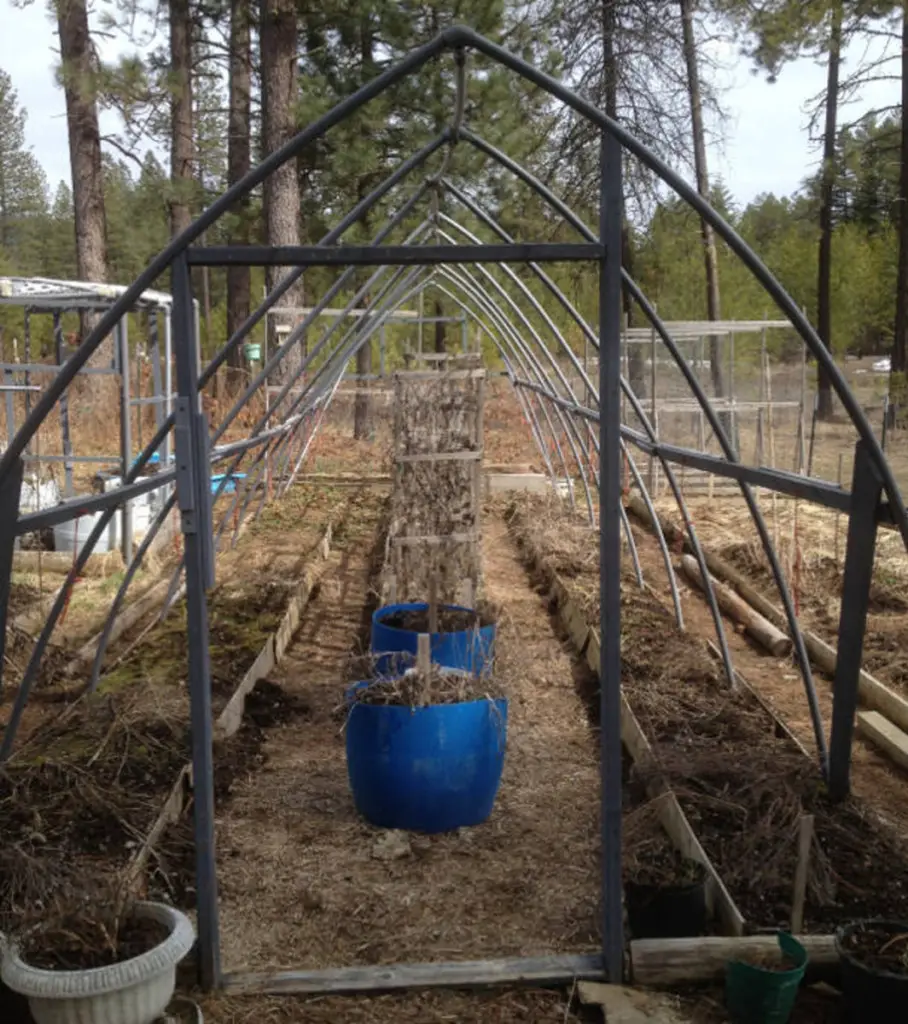
The Hoop House
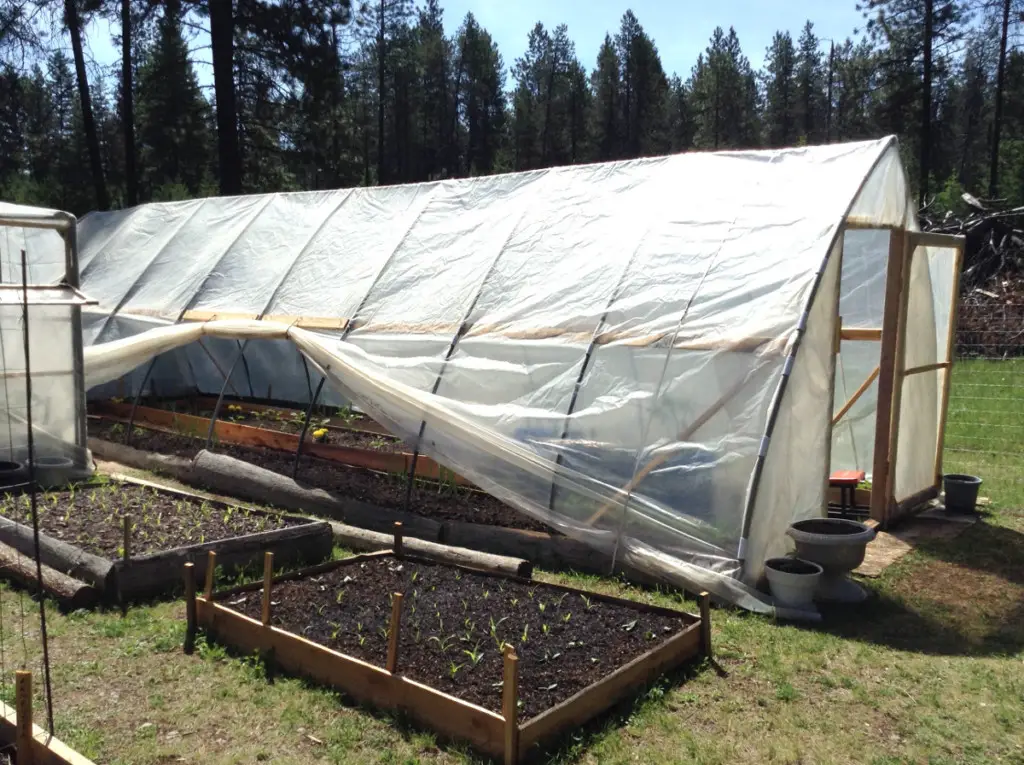
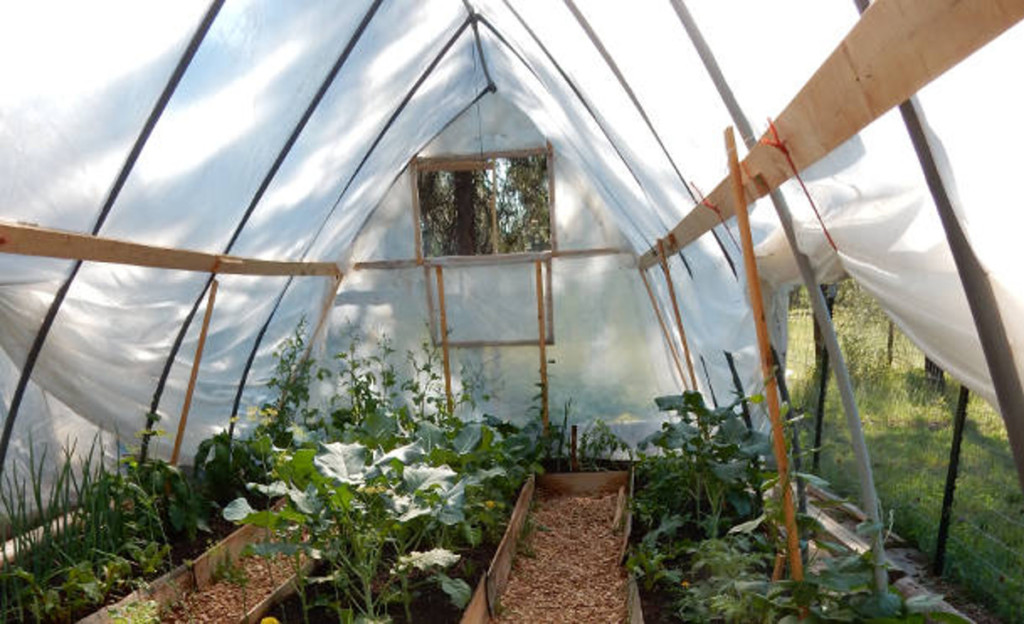
Pictured here is our 10 foot by 32 foot hoop house type greenhouse that we built in a couple of days.
Even in north Idaho this hoop house can have temperatures well above 100 degrees F in the summertime.
To keep from burning plants, you need to have a way to vent the excess heat to the outside.
I discuss the way we did it later in this article.
Basic Construction
Our hoop house has a simple framework made of 1″ diameter PVC Electrical conduit.
The electrical conduit is gray in color and treated to resist the suns Ultra violet rays which can quickly turn the standard white PVC pipe brittle.
We were able to find the 1″ PVC electrical Conduit for less than the regular 1″ white PVC that is not treated to resist the suns ultra violet rays.
For front to back stability we added a ridge pole of 1/2″ diameter PVC Electrical Conduit coupled with 1/2″ PVC condensation traps which were painted gray to hold the hoops the proper distance apart.
Next we added 1″ X 3″ boards half way between the peak and the ground for added stability.
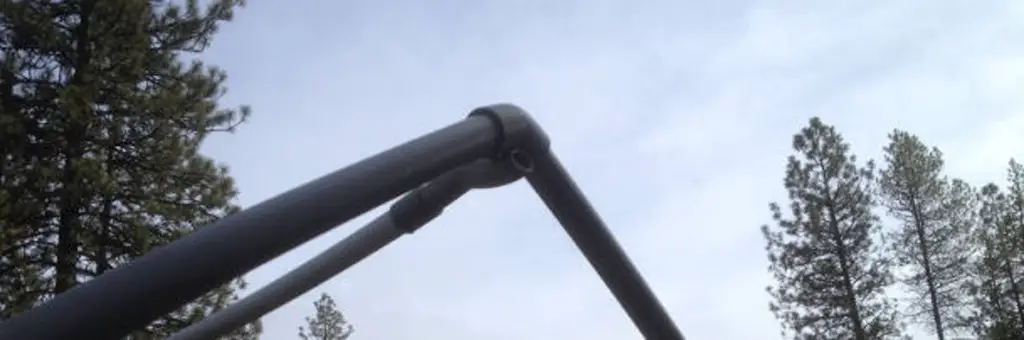
We chose to join the hoops at the peak with a 1″ 45 degree elbow.
We had to use the regular white PVC 45 degree elbows which we spray painted gray to give them some Ultra Violet protection.
We used Rust-Oleum 2X Ultra Cover Gray Spray Paint.
Instead of gluing the PVC components together, we chose to use drywall screws.
This way we could completely disassemble the hoop house and move it and reassemble it if necessary.
To hold the greenhouse plastic to the hoop house we purchased UV treated PVC clips (these were white).
They came in 48″ lengths. I cut the clips into 4″ long pieces with a hack saw and rounded the sharp edges with a metal file.
With this basic overview lets go right into the construction details.
Construction Details
We started by deciding how big we wanted the hoop house to be.
In our case, the amount of space we had for a hoop house was the deciding factor.
We chose 10′ by 32′ with a 2′ wide raised bed along the sides and back.
Then a 2′ walkway on each side and a 2′ wide raised bed in the center of the hoop house.
We spaced each hoop 4′ apart for a total of 9 hoops.
We made the raised beds first and then drove 18′ lengths of 3/8″ rebar halfway into the ground at 4 foot intervals.
Each set of rebar was 10 feet apart.
To lengthen or shorten the hoop house you just add or subtract the right number of hoops.
Next you connect to 10′ lengths of PVC conduit to make a hoop.
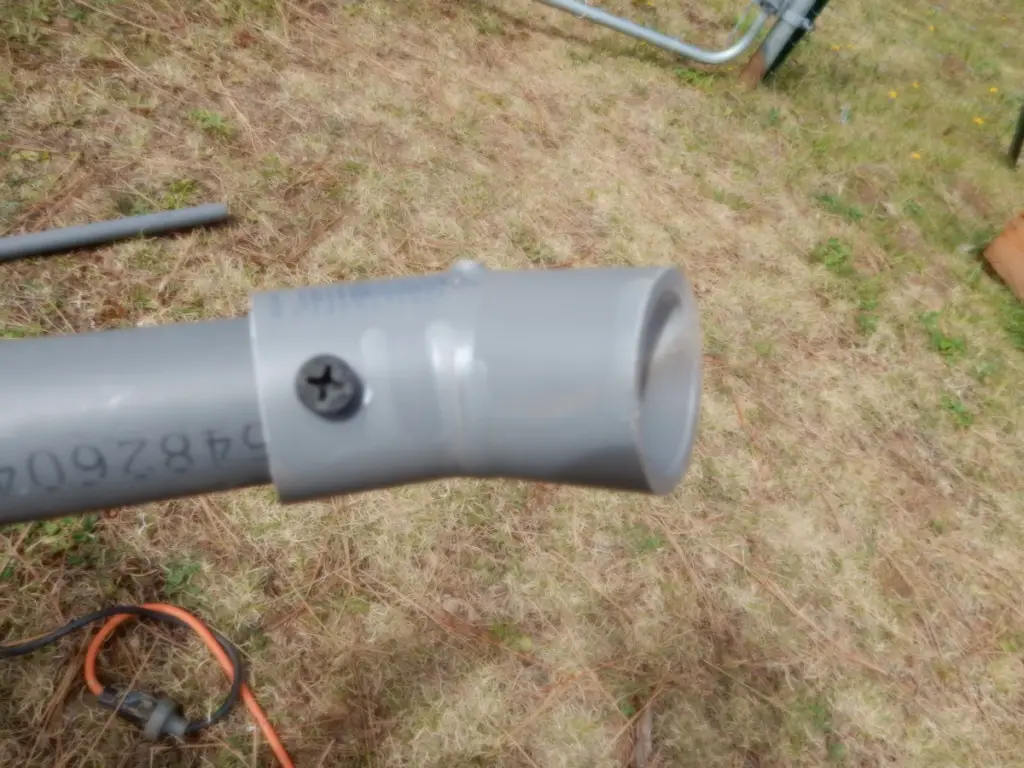
The 10′ length PVC conduit has a flared and a non-flared end on it.
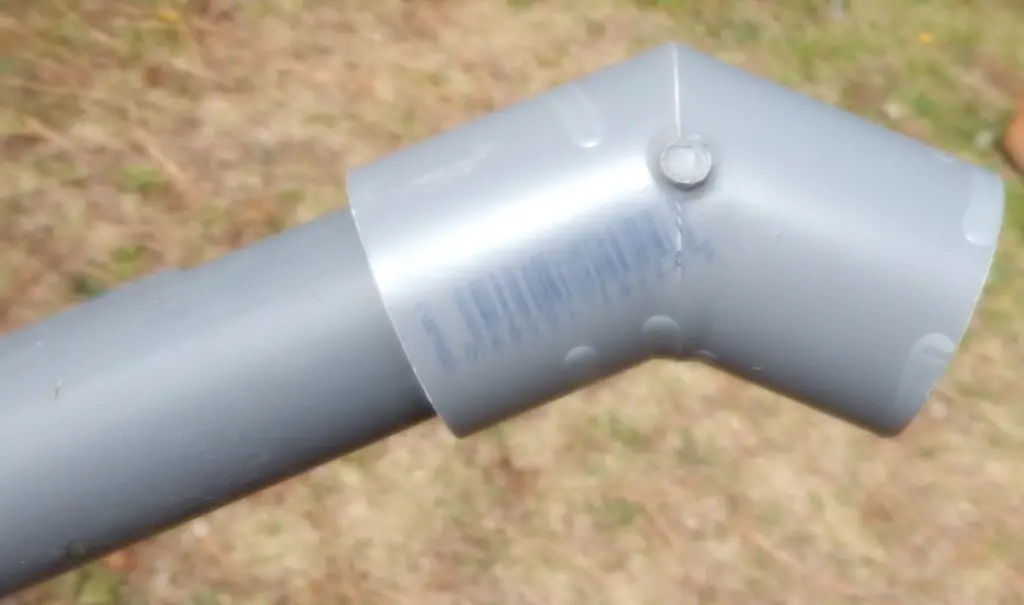
Connect the two non-flared ends together with the 45 degree elbow you painted gray.
You can glue the pieces together or drill a small hole and join them with a 3/4″ dry wall screw which allows later disassembly if desired.
After making the hoops, place the flared ends over the rebar previously driven into the ground.
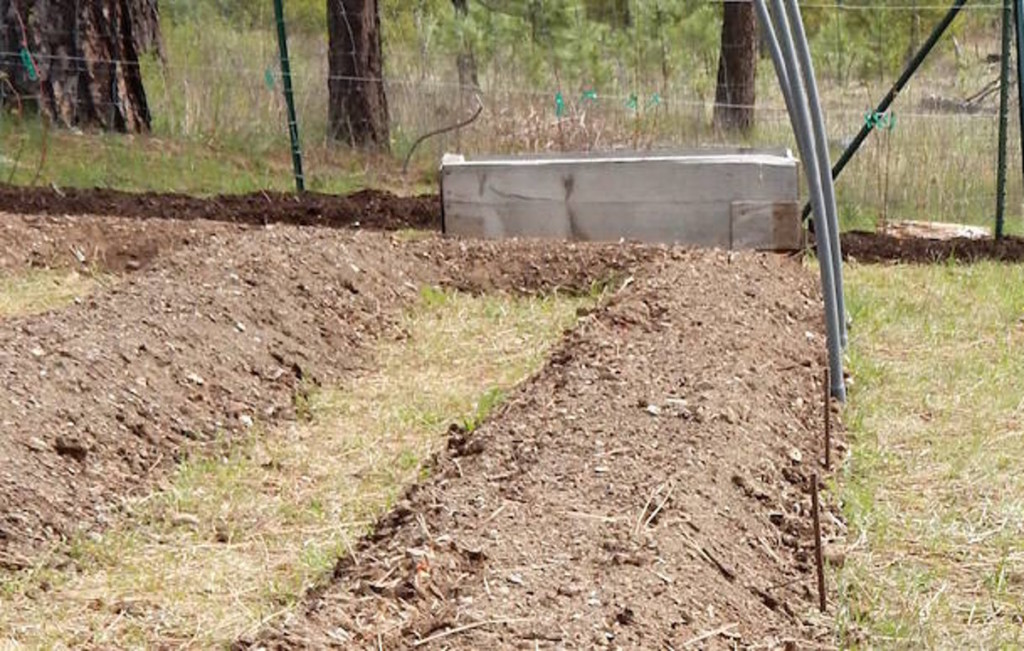
This makes one complete hoop of the framework.
The hoops will look like this when placed over the rebar.
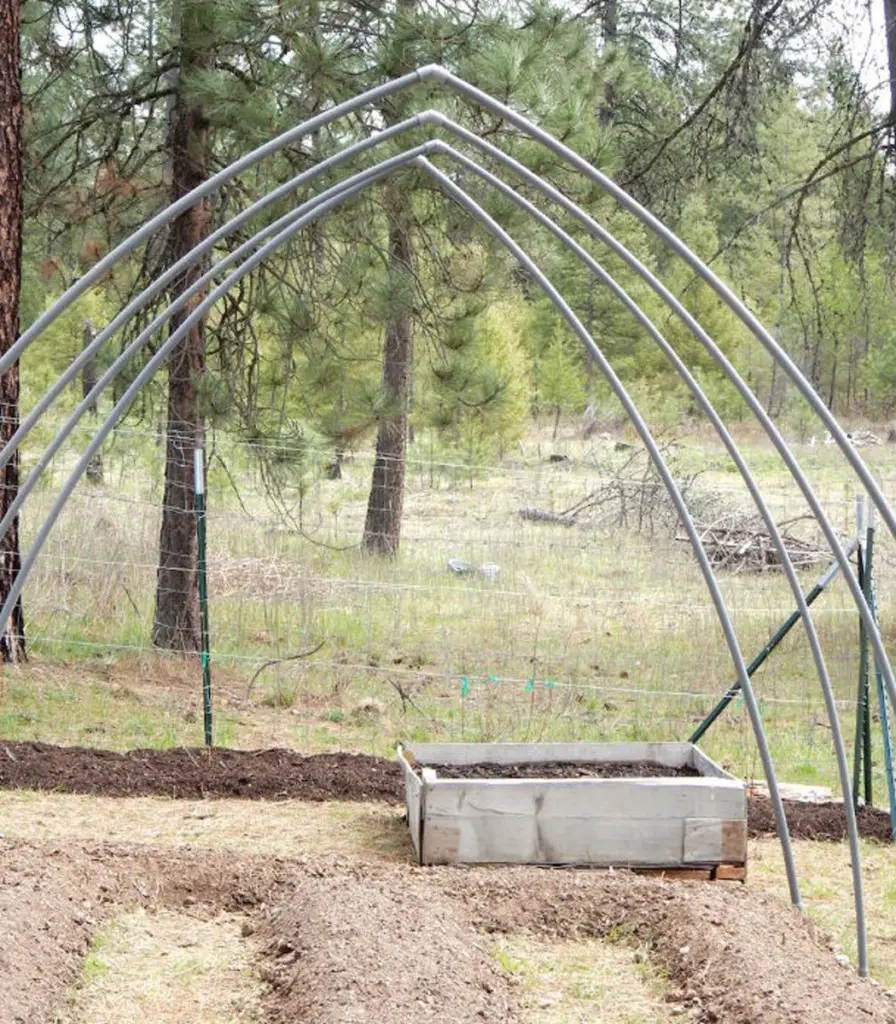
As can be seen in the picture of the 4 hoops, there is a bit of forward and backward sway when the hoops are not connected.
We removed the forward and backward sway by 2 separate methods of stabilizing the hoops together.
At the top, the peak, or ridge, we used 1/2″ PVC conduit connected to 1/2″ PVC condensation traps.
The condensation traps have a bend in them which creates the trap.
They were white PVC so we painted them gray for UV protection.
As can be seen, one condensation trap was placed under each hoop at the peak.
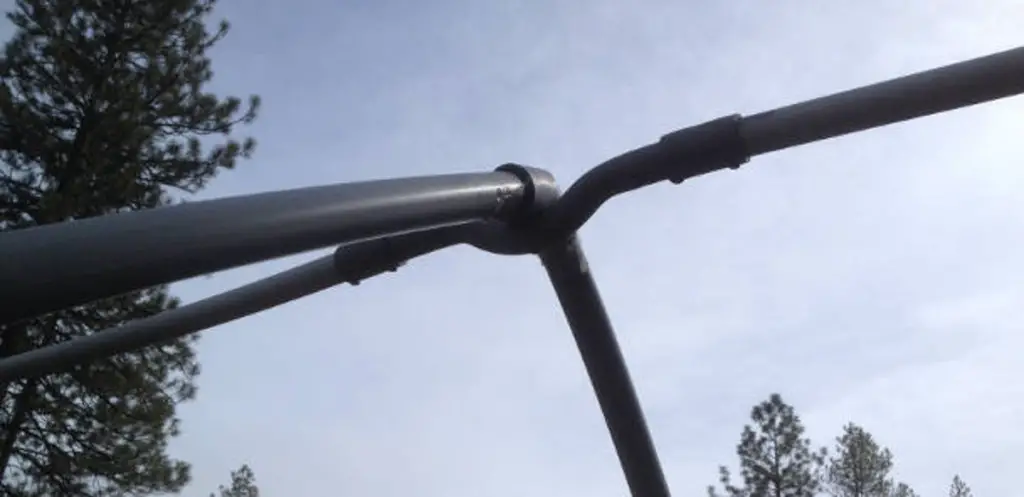
A small hole was drilled through the condensation trap and through the underside of the 45 degree elbow.
A single 1 1/4″ dry wall screw was used to connect the condensation trap to the bottom of the hoop.
Half inch PVC conduit couplings were attached to the condensation traps and secured with a small drilled hole and a 3/4″ dry wall screw.
Next, lengths of 1/2″ PVC conduit were measured and cut so the hoops were kept at 4′ apart at the peak.
The lengths of 1/2″ PVC conduit were attached to the condensation traps and screwed to them with a 3/4″ dry wall screw.
The condensation traps connected to the hoops look like this picture.
One condensation trap is cut in half and attached to the front and back hoop as in the picture above.
This completes the ridge line of the hoop house.
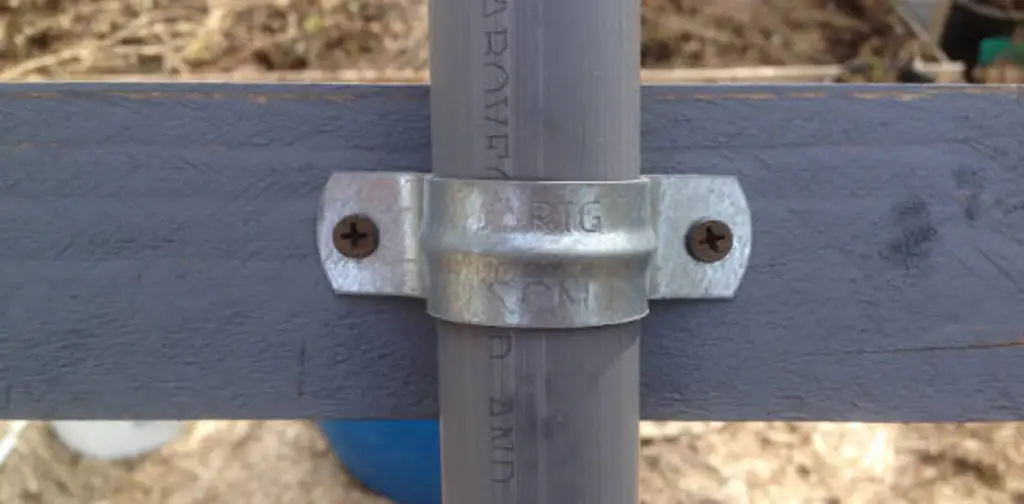
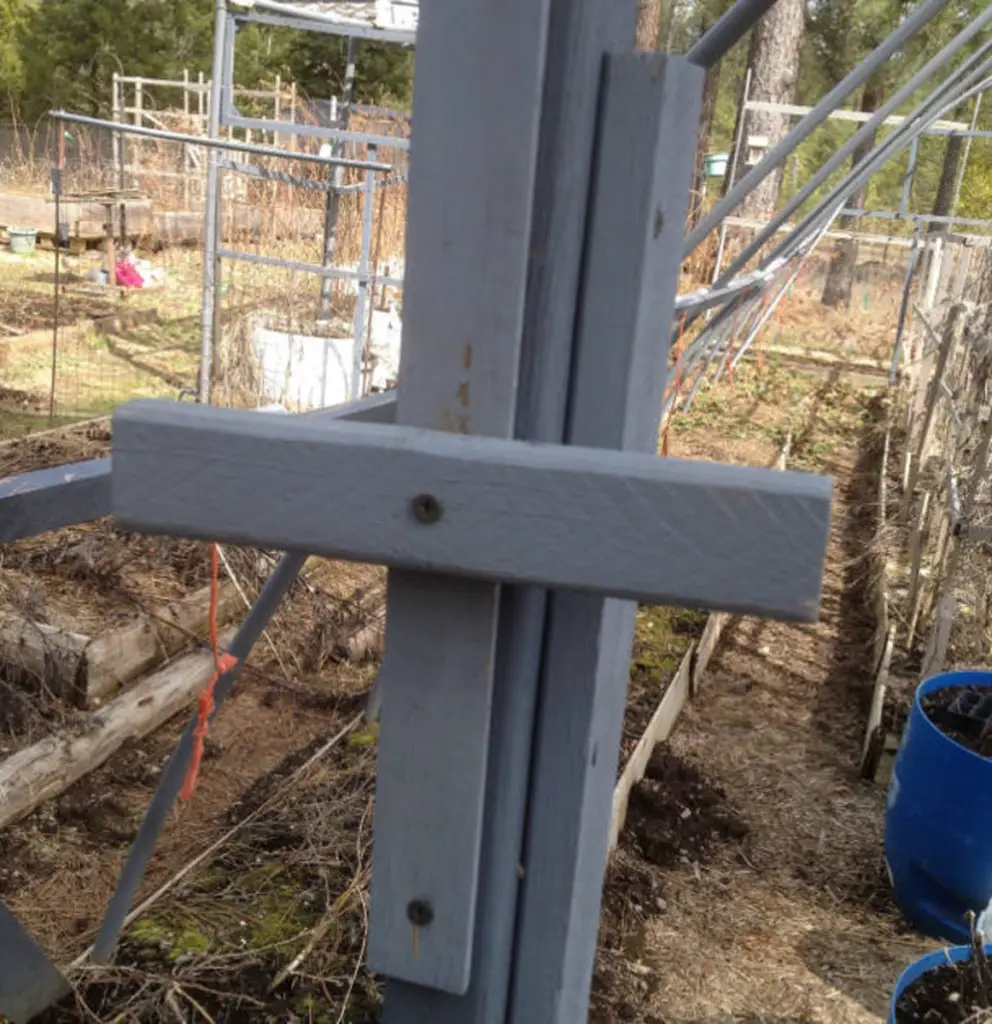
Half way between the ridge and the ground, on each side I used 1″ X 3″ 8′ long boards.
They are held to the hoops by metal 2 hole straps that are 1″ in size.
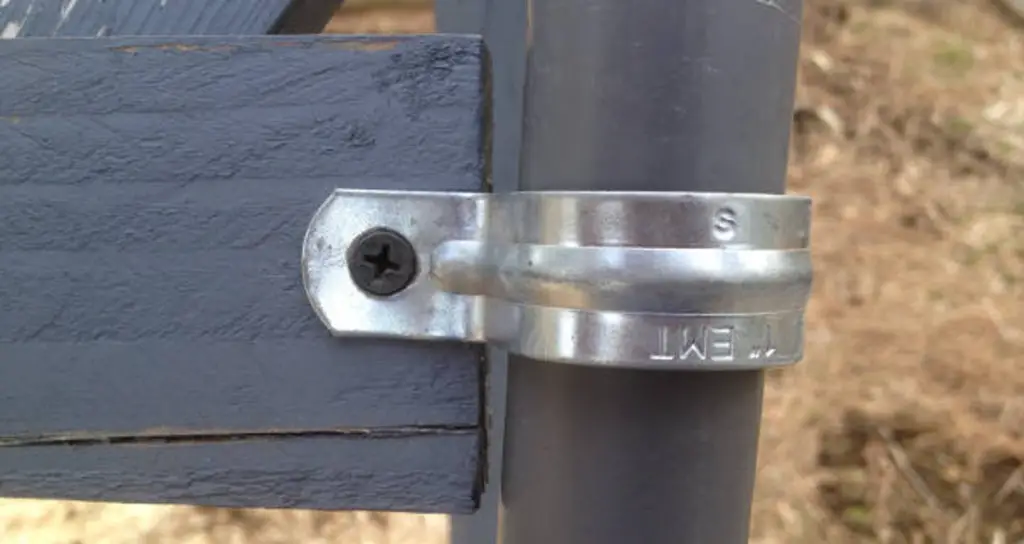
On the front and back end of each side the metal strap was a one hole strap 1″ in size.
Where the 1″ X 3″ boards came together, I scabbed a short 1″ X 2″ board across the joints and screwed them together with 1 1/4″ dry wall screws.
I used dry wall screws because they are very strong, are low cost and their coarse threads make for a strong hold.
We are in our 5th year of using the hoop house and all dry wall screws are still holding fine.
Framing The Front And Back Of The Hoop House
Our garden area has a slight slope to it.
It slopes about 14″ over a width of some 50 feet.
The hoop house is oriented east/west with a long side, 32′, facing south.
The south facing side is about 2″ lower than the north facing side.
If you look closely, you can notice that the south facing side has a slightly larger bow on the south half of the hoop than the north side does.
This does not seem to affect the strength of the hoop house and the plants don’t seem to mind it at all.
As said earlier, the hoop house has withstood winds in excess of 75 mph without a problem!

In the back of the hoop house I framed in a simple window supported on a framework to staple the greenhouse plastic onto.
The entire framework in the back is made out of 1″ X 2″ lumber.
Because the 1″ PVC conduit framework supports the weight of the greenhouse plastic, the window and back framework do not need to be made out of larger lumber.
The window is made out of 1″ X 2″ lumber with simple braces on each corner.
It is attached by 2 door type hinges.
The frame is covered by greenhouse plastic stapled to the wood.
There is a string attached to the top of the window and tied to a “J” hook which holds it shut.
The string can be let out to hold the window open when desired.
To frame the door in the front, I used some odd lengths of 2″ X 4″ that had been left over from a previous project.
If you look closely, you can see where the ground slopes to the right side, south.
If you look at the bottom of the door frame you will see the right side raised up a little.
You can also notice the right side of the hoops are bowed a little more than the left side.
I used a level to get the door framed with the sides, top and bottom squared.
The door is 6′ 6″ high and wide enough for me to wheel my old wheelbarrow through it.
I had to offset the door a little to the left because of the lengths of 2″ X 4″ boards I had available.
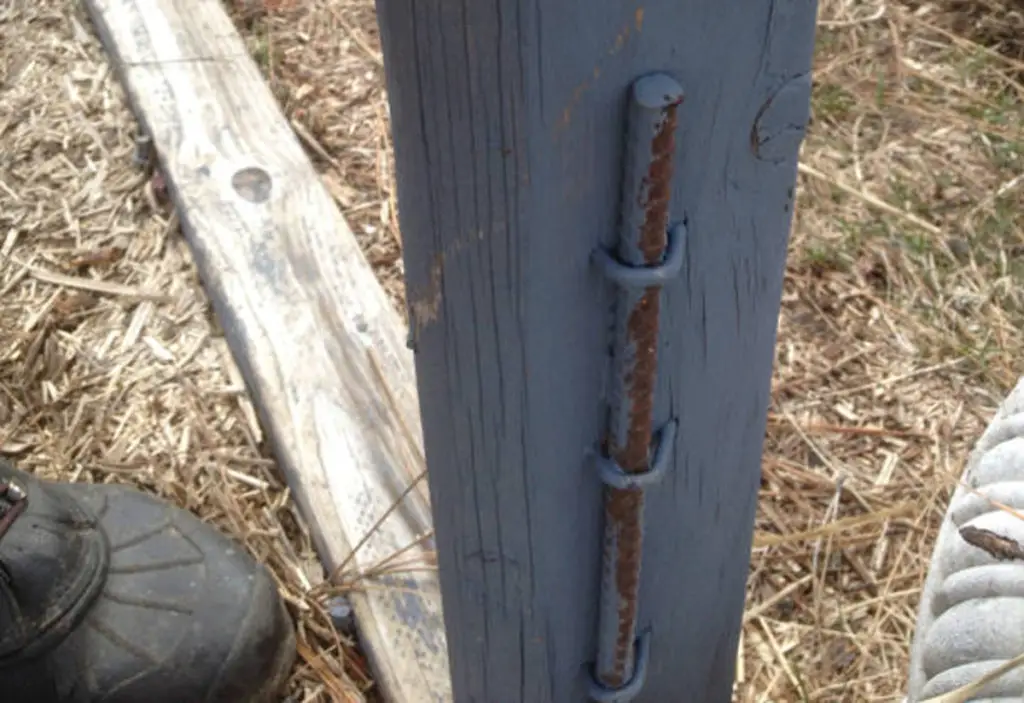
The door frame is stabilized at the bottom on both sides by a length of 3/8″ rebar driven into the ground and stapled to the sides of the door frame as pictured.
The door latches by a simple mechanism that has latched doors of sheds and outbuildings for over 100 years.
The short board on the right side of the door frame keeps the wind from pushing the door in.
Since our garden is surrounded by a fence and locking gate we do not worry about intruders wandering in and opening the hoop house door.
The door frame is 1″ X 3″ lumber with a 1″ X 2″ brace just above the middle.
The corners are reinforced by a simple brace.
There is a pull handle on the outside of the door. Two door hinges hold the door in place.
The door is covered with greenhouse plastic that is stapled to the wood.
On both sides of the hoop house, in front and back, there is an angled 1″ X 3″ to give additional stability.
They were attached just above the middle of the front and rear hoops.
And attached to the inner side of the boards used to hold the dirt in the hoop house raised beds.
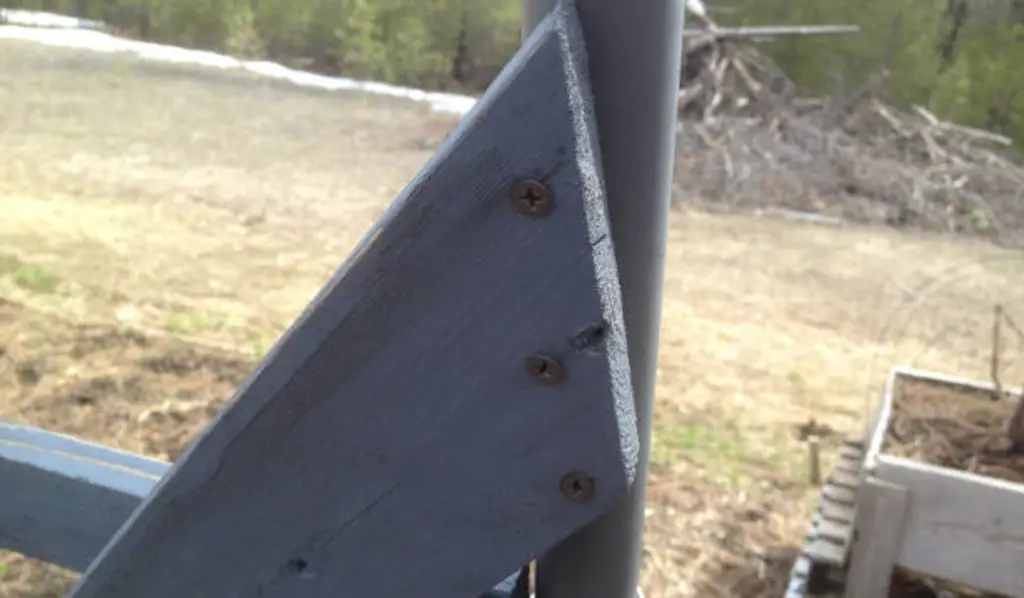
Those boards were attached by three 1 1/4″ dry wall screws at the top and bottom of the boards.
Installing The Greenhouse Plastic
Do not try to use plastic sold at building supply houses!
That is not greenhouse plastic and you will have a shredded mess before the end of the first growing season.
Use only genuine greenhouse plastic.
If you are fortunate, you might find a commercial greenhouse that is replacing his greenhouse plastic after a couple of years usage.
If you help him remove the old plastic and replace it with new, you might be given the 2 year old plastic for your help!
That plastic will be good for 2 or 3 more years of usage!
Since most commercial greenhouses are a lot larger than your hoop house you could have years worth of greenhouse plastic.
Carefully measure and cut this greenhouse plastic obtained for your labor.
I’d cut it 2 feet longer and wider than needed.
This gives plastic to attach to the front and back hoop and cover the hoop house all the way down to the ground on both sides.
While at it, cut a second piece the same size and fold up for use when the first piece is no longer useful.
If your hoop house was 10′ X 24′ you would cut a piece of greenhouse plastic 22′ X 26′ in size.
The 26′ length gives you plastic to attach to the front and back hoop.
The 22′ width will give plenty to cover the top and down to the ground on each side.
Covering the ends of the hoop house will also take some measuring.
For the back you will need to measure from the sides of the window out to the hoops and add enough extra to be able to staple the plastic to the window frame and have enough to extend past the edges of the hoop by about a foot.
The area below the window can be one piece stapled to the 1″ X 2″ board that runs underneath the window from side to side.
You will need about a foot hanging over the edge of the hoop on each side.
For the front of the hoop house you will need to do some measuring also.
I cut three pieces.
One to go above the door and one to go on each side of the door.
I made them big enough to staple to the door frame and have about a foot hanging over the hoop on each side.
If you need to purchase greenhouse plastic you need a width that will give at least a foot extra on each side.
For the length of greenhouse plastic to purchase you need the length of the hoop house plus 2 feet.
And then add to that length the width of the greenhouse at the bottom, plus two feet, added twice!
So if the hoop house was 10′ X 24′ you would need to order 24′ + 2 feet for the length.
And then add 10′ + 2 feet for the front and 10′ + 2 feet for the back.
That would be a total length of 26′ + 12′ + 12′ = 50 feet minimum!
The greenhouse plastic is attached to the front hoop and back hoop with the 4″ UV treated white PVC clips mentioned at the beginning of this article.
You will need one clip for about every 18″ of hoop.
This is 7 four inch clips per side in front and 7 four inch clips per side in the back for a total of 28 clips.
To get 28 four inch clips you need three 48 inch 1″ snap clamps.
Controlling The Temperature In The Hoop House
It is not unusual for the temperature inside the hoop house to get above 100 degrees F by 10 or 11 AM.
Even in the mountains of north Idaho some 50 miles from the Canadian border.
You need a thermometer inside the hoop house.
The first year we placed the thermometer up near the peak inside the hoop house.
Problem with that placement is heat rises and we were not getting the temperature at the plant level.
We now place the thermometer about 4 feet above the floor of the hoop house.
This gives us a much better idea of the temperature at the plant level.
To regulate the temperature inside the hoop house we roll up one side, both sides, or a portion of one or both sides as needed.
It takes a few days to learn how much you need to roll up to keep the temperature where you want it to be.
We like our temperature to be in the 75 to maybe 80 degree range.
It will fluctuate some due to clouds covering the sun or stray breezes.
When I put the greenhouse plastic on the hoop house I get it as straight as possible.
Then starting at the peak on the back I stretch it down the back hoop alternating from one side to the other as I put the snap clamps on the hoop.
The last clamps are placed on the bottom of each side.
Then I go to the front of the hoop house and stretch the greenhouse plastic toward the front.
And then alternate down the front hoop with the clamps as I did on the back hoop.
This usually gives me a pretty tight fit for the greenhouse plastic.
Now to fix the sides so they can be rolled up to regulate the temperature.
We developed a simple but efficient way of keeping the sides rolled up.
On the inside of the 1″ X 3″ boards running down the side, we placed a dry wall screw in the middle of the space between the hoops.
From this we hung about 12 or 14 inches of plastic binder’s twine with a loop on the free end.
On the outside of the hoop house, we placed a 1″ X 2″ board screwed to the 1″ X 3″ board underneath.
Two 1 1/4 ” dry wall screws go through the greenhouse plastic holding the two boards together.
The 1″ X 2″ board helps hold the plastic down taunt. In the middle of this outside board we placed a “J” hook.
Now we have the means to roll the sides up as needed and hold the rolled sides up by hooking the plastic binder twine with the loop in the end over the “J” hook.
This holds the plastic up for ventilation!
You can roll up the center section of plastic on each side if that is all that is needed.
To roll up more than one section on a side you will have to remove a snap clamp or two on the front and back releasing the greenhouse plastic on the sides.
Replace the snap clamp so it holds the front and back greenhouse plastic.
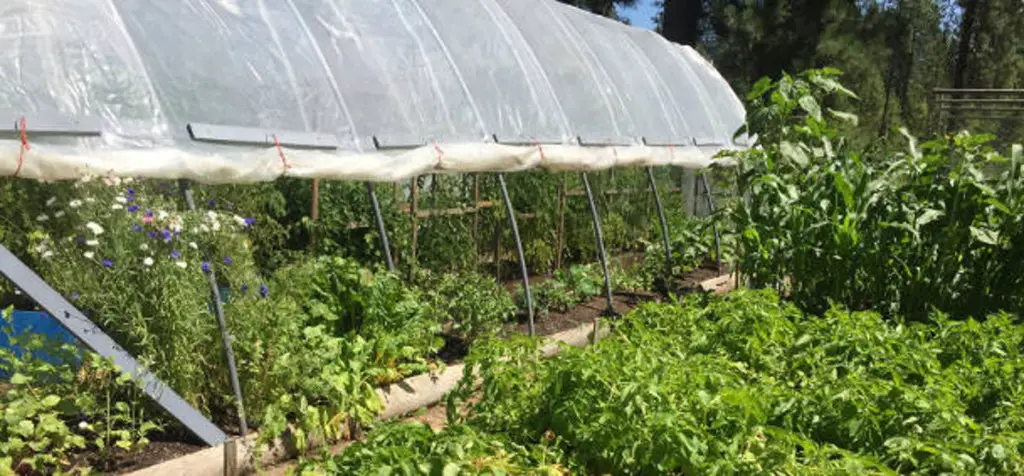
It takes less than 5 minutes per side to roll up the sides as seen in the picture.
This simple method is fast, easy and saves money!
To keep the front and back greenhouse plastic from coming off the hoop when I remove the snap clamps to roll up the sides, I place a few short pieces of packing tape to hold the front and back greenhouse plastic to the hoops.
We replace the clips on the hoop after rolling up the sides as seen in this picture.
The inside peak is about 8 feet high.
This gives plenty of room for tall plants in the center row.
Shorter plants grow on the outside rows.
We have 188 square feet of raised beds plus space for 2 halves of a 55 gallon drum and 2 other large planters in this hoop house.
Some days the temperature can reach 110 – 120 degrees inside the hoop house.
The outside temperature might only be in the mid 70’s.
The hoop house has the long side facing due south.
So it gets a lot of sunshine and can get very hot inside even on cool fall days.
This is why you need to have a way to measure the temperature inside.
It is common for us to prop the door open and also lower the window in the daytime in the summer.
Doing this helps with the ventilation when needed.
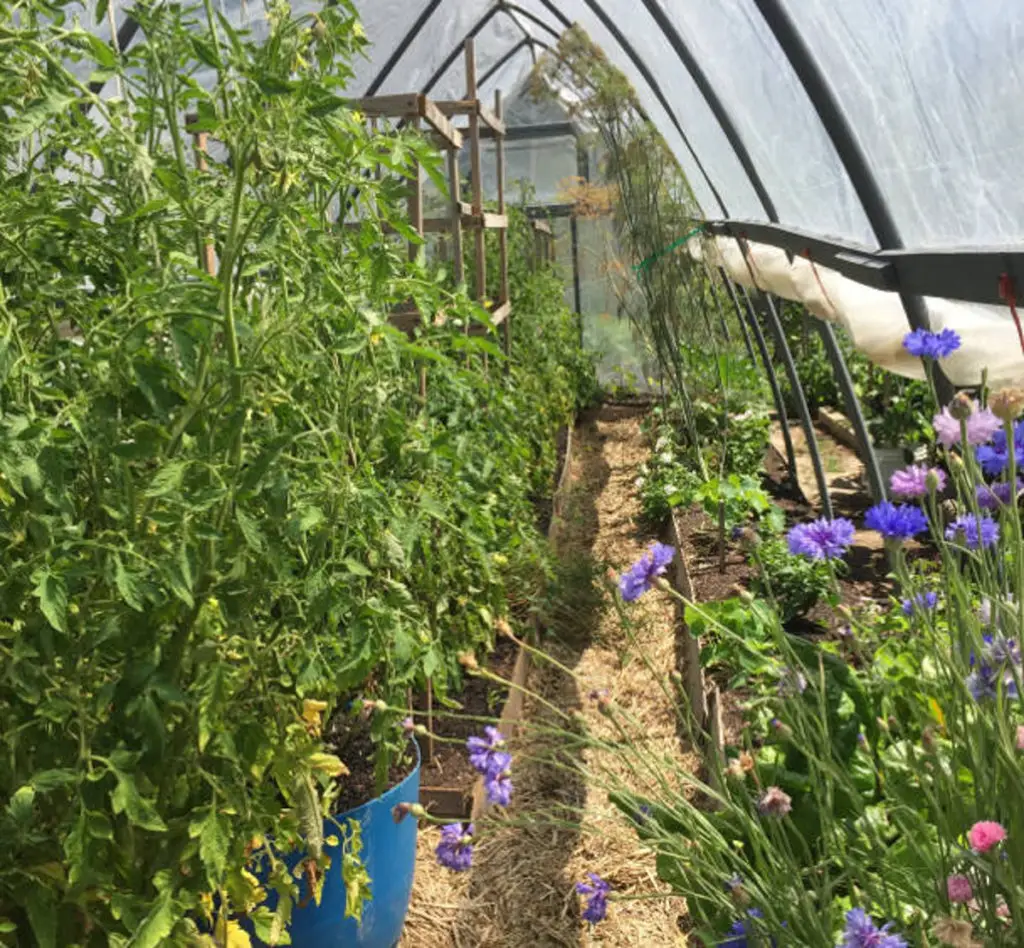
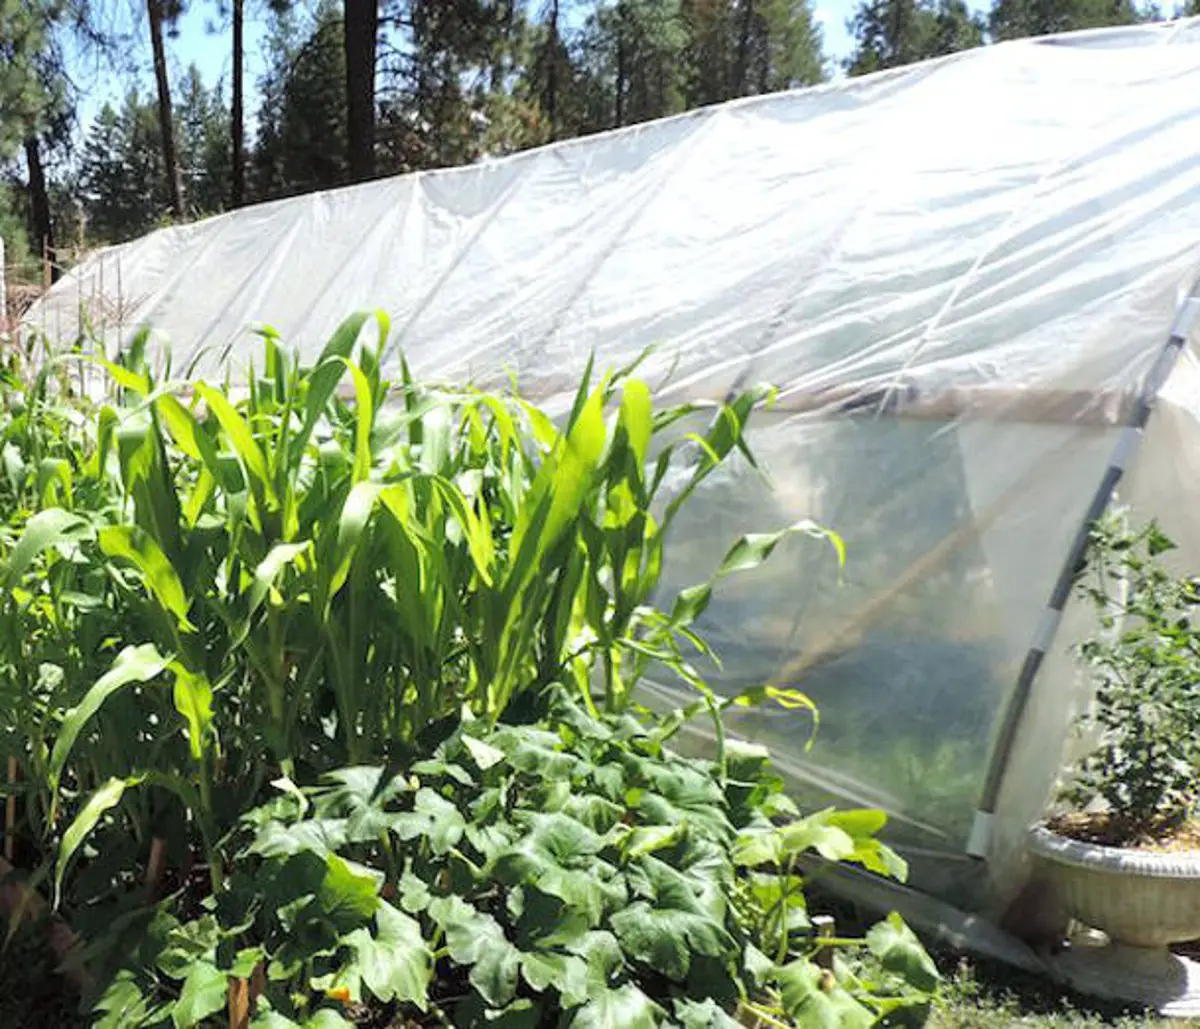
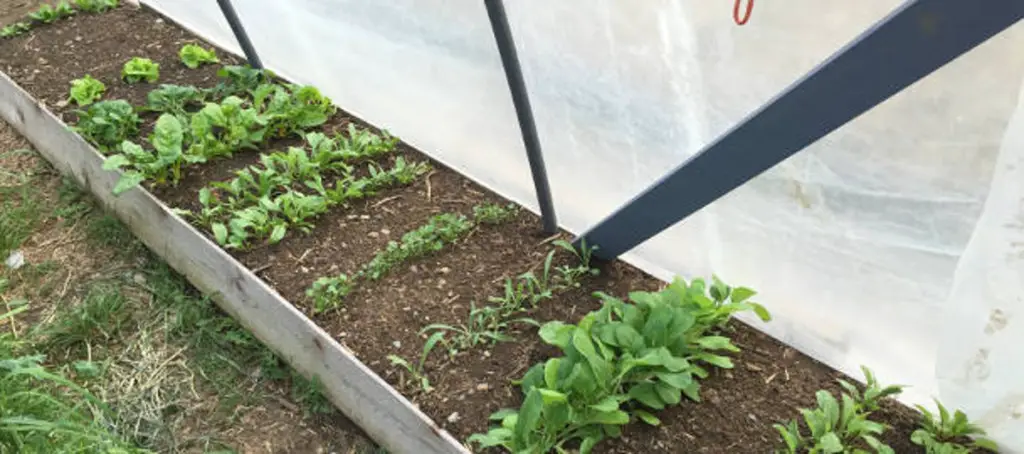
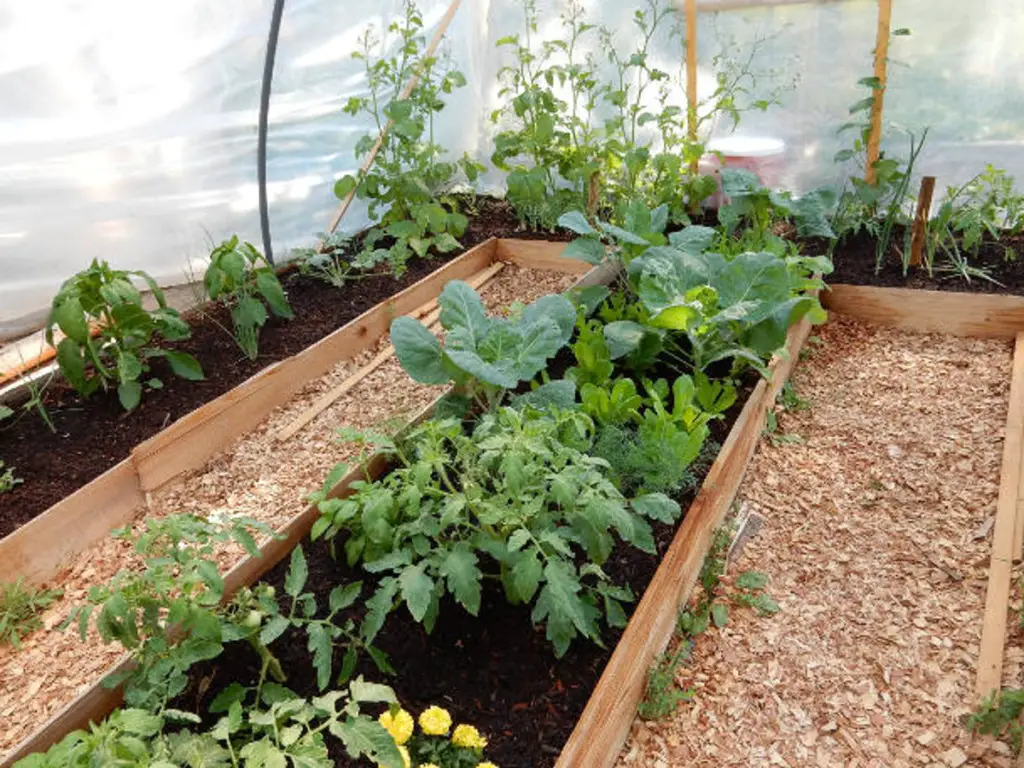
You can see how big the plants grow in the hoop house. The plants on the left are tomatoes.
This picture was in the second year we had the hoop house.
We did not have any plans when we built this hoop house. We had researched hoop houses and this design came out of my head.
We Do Not Leave This Hoop House Up All Year
This hoop house is not designed to support a snow load.
PVC conduit in even 2″ diameter size is not sufficient to support a snow load.
Light powdery snow will slide off but if there was to be a heavy wet snow you can expect to see the hoops buckle under the load and the greenhouse plastic would probably tear.
I have seen several hoop house style greenhouses of different designs that were constructed out of PVC pipe left up during the winter.
They end up with the PVC pipe caved in and some of them have torn greenhouse plastic in the process.
When it is getting close to time for the first snowfall I remove the greenhouse plastic and store it away for the winter.
First I go along the sides and remove the 1″ X 2″ boards that have the “J” hooks in them.
Then I take the snap clamps off the front and back hoop and slide the greenhouse plastic off the hoop house and fold it up and put it away for the winter.
Then I take a small narrow straight blade screw driver and pry out the staples holding the greenhouse plastic to the door frame in front and to the framework in back of the hoop house.
Then I take the snap clamps off the front and back hoop.
Those pieces of greenhouse plastic are folded and put away for the winter along with the snap clamps.
We place cedar chips in the walkways inside the hoop house.
This helps keep down the grass and weeds in the walkways.
Watering can be done by watering cans, a hose or by a drip system of some kind.
I am considering using soaker hoses in the hoop house to see how well that works.
Plants that grow well on the outer raised beds of the hoop house include; Peppers, Kale, Swiss Chard, Eggplants and some Bush Beans as well as Green Onions.
Interspersing a few flowers among the plants adds beauty and places for beneficial bugs to enjoy and help with keeping the unwanted bugs away.
Miscellaneous Construction Ideas
I believe you could use the same construction ideas and widen the hoop house to 12 feet instead of 10 feet.
We did not have the room to try to make it 12 feet wide.
By widening it you will be lowering the ceiling height some but should still have a 6 foot or so ceiling height.
At 12 feet wide you could widen the two outside raised beds to 3 feet wide instead of 2 feet wide.
Another option if you made the hoop house 12 feet wide would be to make the center raised bed 4 feet wide.
This would give a lot more room for tall plants in the hoop house.
To make 18″ lengths of 3/8″ rebar, use a fine hacksaw blade and cut the rebar about 2/3’s of the way through.
It will bend and brake at this point.
It is easier to start a cut on 3/8″ rebar with a fine hacksaw blade than it is to start the cut with a coarse hacksaw blade.
I used an old hammer to drive the rebar into the ground.
To hold the boards to the sides of the raised beds, I used 3/8″ rebar of about 18″ long every 4 or 5 feet.
I drove the rebar into the ground to where the top of it was just below the top edge of the board.
Then I drilled a small hole on each side of the rebar about an inch or so below the top of the rebar.
I placed a wire through the holes and wrapped it around the rebar and tightened it.
The greenhouse plastic is by far the most expensive part of your hoop house.
Cared for, the plastic should be good for 4 or 5 years.
We are on our 5th year and the plastic is working just fine.
Some sellers of greenhouse plastic do not recommend you place it against PVC hoops.
They sell various products to put between the PVC hoops and the greenhouse plastic.
We have always put our greenhouse plastic directly against our PVC conduit hoops.
We have not had any problems placing our greenhouse plastic against the PVC conduit hoops.
It is up to you whether or not you place something between the greenhouse plastic and the PVC hoops.
Some of the material we used in our hoop house was left-over from other projects.
The hoops and the framework for the hoop house cost us less than $50.
We were blessed to be given the greenhouse plastic by a friend who had helped a commercial gardener remove and replace the plastic on his greenhouses.
If we had purchased all of the materials new for the hoop house, our cost would have been around $225.
Materials List
- 1″ PVC electrical conduit 10′ lengths. Need 2 per hoop.
- 1″ 45 Degree elbow, White PVC, will need to paint it. Need 1 per hoop.
- 1/2″ PVC electrical conduit 10′ lengths. Enough for length of hoop house.
- 1/2″ PVC condensation drains. 1 per hoop plus 1 to cut in half for front and back hoop. Will be white PVC and need to be painted.
- 1 spray can Rust-Oleum 2X Ultra Cover Paint + Primer in Gray to paint white PVC components.
- 2 hole metal straps, 1″ size, 2 per each hoop except front and back hoop.
- 1 hole metal straps, 1″ size, 4 total, 2 for front and 2 for back hoop.
- 3/8″ rebar, sufficient lengths for 18″ rebar, 2 per each hoop including front and back hoop. Plus two 24″ lengths to stabilize the bottom of door frame and enough in 18″ lengths to secure the board to the raised beds.
- 1″ X 3″ X 8″ boards. Enough to go down each side of hoop house, plus 4 for corner braces on front and back plus enough to make the door to be covered in greenhouse plastic.
- 1″ X 2″ X 8″ boards sufficient to frame in rear window and make rear window to be covered with greenhouse plastic. Plus a brace on the door plus enough to make a board 3′ long between each hoop on the outside to hold plastic taunt and have a “J” hook to hold the rolled up sides up.
- 4 hinges, 2 for door and 2 for window.
- 3/4″ and 1 1/4 ” dry wall screws
- “J” hooks, 1 for between each hoop on both sides of hoop house.
- Wood scraps to make corner braces for door and window.
- Sufficient snap clamps to hold greenhouse plastic on front and rear hoops.
- Thermometer to monitor hoop house temperature.
- Drill and small bit to drill holes in wood and PVC conduit.
- Phillips Screw driver to drive dry wall screws with.
- Sufficient Greenhouse Plastic to cover entire hoop house plus the stated extra needed for attachment and if cuts are not completely straight.
Related Questions
How much more growing season can a hoop house give?
We get an average of about 7 or 8 weeks longer growing season in north Idaho.
We start plants indoors before we have the hoop house set up for the growing season.
This gives us an additional 2 or more weeks time for produce to develop and be harvested before bad weather sets in just before the winter.
How do you repair rips or tears in greenhouse plastic?
There is a special greenhouse plastic repair tape that is a very similar material to the greenhouse plastic.
It works very well.
Regular packing tape, even heavy duty packing tape will peel off greenhouse plastic in a short time.
The greenhouse plastic repair tape will hold for years.
How hard is it to put the greenhouse plastic on the hoop house?
It depends on how hard the wind is blowing!
It is a job that is easier with at least two people.
However, for the last 3 years I have learned how to put it on and take it off by myself.
To put it on, if there is a little wind blowing, I start at the end of the hoop house where the wind holds the plastic against either the front or back of the framework.
Then I carefully walk the plastic up and over the hoops.
I have to use a step ladder to reach up over the peak.
But carefully and easily I am able to pull the plastic over the tops of the hoops and secure the original end on that end hoop with snap clamps.
Then I secure the other end with snap clamps.
This takes around 25 to 30 minutes of time on the average.